To do this, following the following steps:
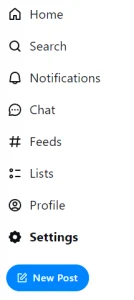
1: on the side menu, click on "Settings" or access the link:
On the Settings page, you'll have the sections "Signed in as," "Basics," "Privacy," and "Advanced."
2: in the "Advanced" section, click on Change Handle. A dialog box will appear.

3: in the dialog box, type your new username.
4: click the "Save" button that will appear on the top-right corner of the dialog box.

Using You Domain Name as Username on Bluesky
On Bluesky, it's possible to use a domain name as your handle. That is, if you own a website, like virtualcuriosities.com, you can make this domain with the dot appear on Bluesky.
To do this, follow the following steps:
1: click on the button "I have my own domain" in the Change Handle dialog box.
2: type your domain (with .com) in the text box. Don't type the www. If your website is hosted in a subdomain, e.g. nasa.tumblr.com, you won't be able to use this function, you need to be the owner of the second level domain.
3: you'll need to verify the ownership of your domain name using the code written in the text box. To do this, go to the website (registrar( where you contracted the domain and add a TXT record as indiciated.
Although this sounds complicated, after you learn how to do this once it's easy, and this method to verify domain ownership via DNS is very common.
In my case, I had to create a record with the name _atproto nad the value did=did:plc:ug7meewa7rcuznpxvd6onsar. Note that when you create a TXT record, you will write did=... in the record and place all of this in a single field. It's a bit confusing because it seems like they're telling you to create a field called did with the value did:plc:ug7..., but that's not how DNS works. You copy the entire thing and paste it.
Observe also that this confirmation code isn't a secret, like a password or something of sort. It's only to confirm that you have control over the domain. The value written in the TXT record is public and anyone can see it.
After adding the record to your domain, try to confirm that you are the owner on Bluesky. It's possible that this doesn't work immediately and it takes a few minutes for the DNS to be updated, so try again after waiting a while.
Leave a Reply